Azure Backup
What is Microsoft Azure Backup? Azure Backup is a backup solution that Microsoft offers to take advantage of it’s Azure Cloud.
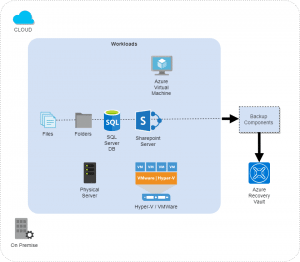
The concept is to provide backup as a service. Not only for Virtual Machine deployed in Azure but also to the following scenarios:
- VMware Hyper-V virtual machines running on Linux and Windows
- Physical Windows Servers
- Files, folders, SQL Server DB, SharePoint server
Why use Azure Backup (Advantage)
Backup solutions have evolved to make use Cloud as the endpoint. Which means the backup destination is the Cloud.
This is different from the traditional backup method that points to disks or tape (which translate to hardware maintenance cost).
One of the Cloud criteria that helps us to reduce cost is we don’t have to maintain the hardware.
Storage is also dynamic in Cloud. This helps the users as the Storage usage for backup is more efficient (low cost and save time).
Followings are the key benefits that Azure Backup offers:
- Automatic Storage Management
- Automatically allocate and manages backup storage on Azure
- Pay as you use model (pay only for what you are consuming)
- Unlimited Scaling
- An unlimited scale of the Azure Cloud provides limitless storage
- High-availability, no cost for maintenance and monitoring.
- Multiple storage options. Backup storage option based on requirement:
- LRS (Locally redundant storage)
-
-
- Only if data can easily be constructed during data loss
- More Information here: https://docs.microsoft.com/en-us/azure/storage/common/storage-redundancy-lrs
- GRS (Geo-redundant storage)
-
- Replicates data to another data center in the secondary region
- More information here: https://docs.microsoft.com/en-us/azure/storage/common/storage-redundancy-grs
- Below are some simple comparison between LRS and GRS to determine which Backup storage option is suitable
-
|
Feature |
LRS |
GRS |
|
Cost |
Low |
High |
|
Durability |
Low |
High |
|
Replication |
Same region |
Another DC (another region) |
- Unlimited data transfer
- Amount of outbound and inbound data transfer is not limited
- No charge on data that is transferred
- Import/export of large data will have some inbound charges
- More information on offline backup workflow here: https://docs.microsoft.com/en-us/azure/backup/backup-azure-backup-import-export
Note: Azure Backup Outbound Data is data transferred from recovery service vault during the restoration process
- Application-consistent backup– An application consistent backup means the application data that have been backed up is consistent in term of the transaction.
How to achieve this? When taking a VM snapshot, there should be no unfinished transaction.
That way, the application can be loaded once the VM is successfully booted without any additional fix needed to restore data.
Note: To make sure application consistent VM backup is successful, Windows is depending on VSS (Volume Snapshot Service)
- Long-term retention– There is no limit to how long you can keep the data in Recovery Service Vault. Thus, we can use the Recovery Service Vault for a Long term or short term.
NOTE : To use Azure Backup to protect your data, you must create a Recovery Services Vault in Azure.
Previously Azure Backup will point to Azure Backup Vault
Let’s start the backup process (step-by-step)
Note:
Make sure you have already built at least a VM in order to go through this exercise.
In order to start backing up Azure VMs, we need to do following steps:
- Create Recovery Service Vault (contains backup data)
- Backup Options
- Define backup policy (to set schedule & retention range)
- Select items to backup
- Enable Backup
- Restoring Backup
Create Recovery Service Vault
Note: Backing up Virtual machine is a local process. Recovery Service Vault need to be created for each of the location where there is a VM to be backed up.
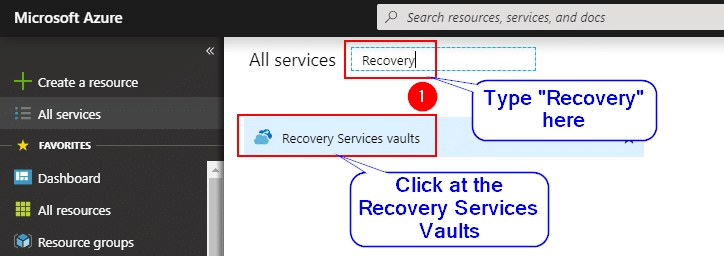
- Go to the All Services and type Recovery.
Recovery Services Vaults will be displayed in the list below. Click at that.
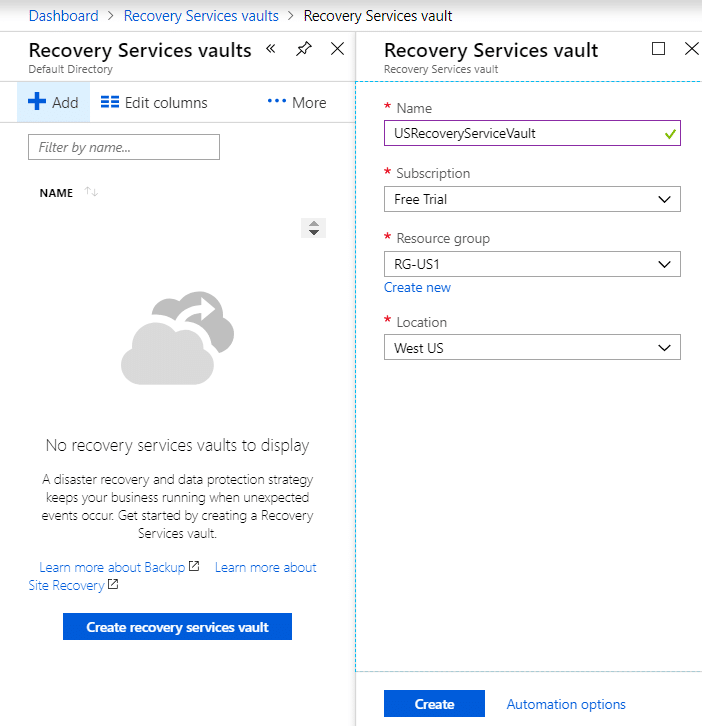
- At the Recovery Services Vault form, fill up the form and click Create
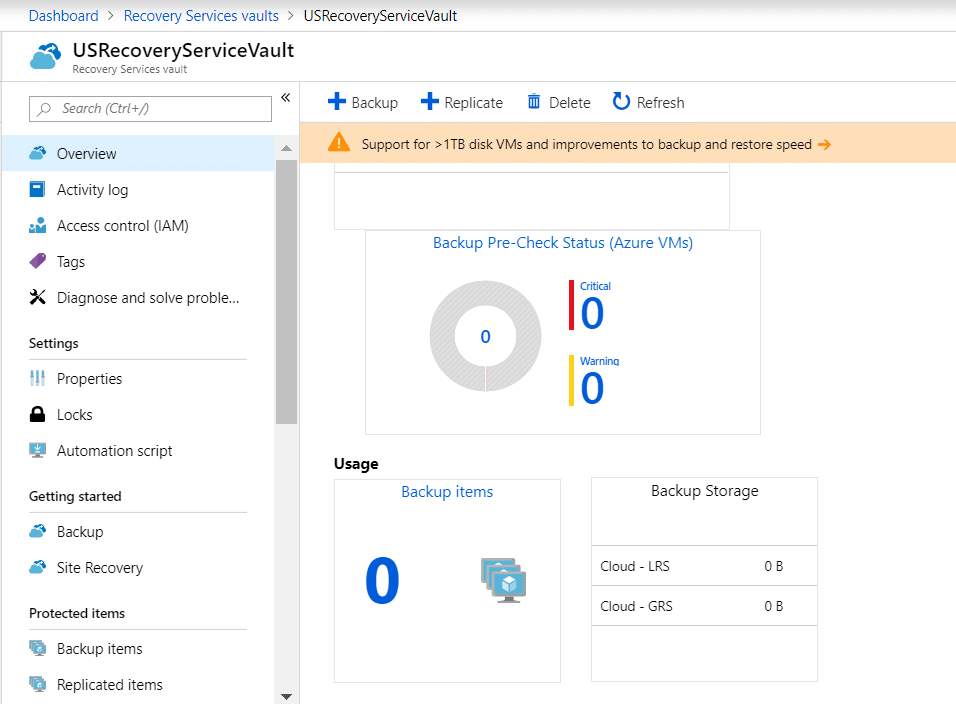
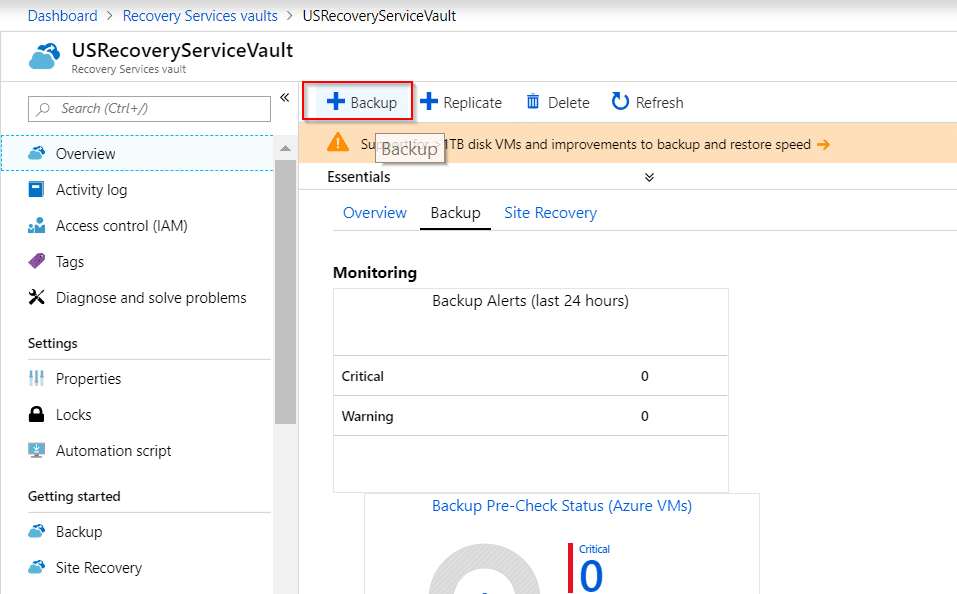
- Once the Recovery Service Vault is ready, you can see your backup information in a nice dashboard for backup.
When talking about backup, you can choose your workload whether it’s on Azure or on-premise. Let me show you those options.
Option1: Backup for Azure Virtual machine
- Click on the backup button. You will then need to choose Azure
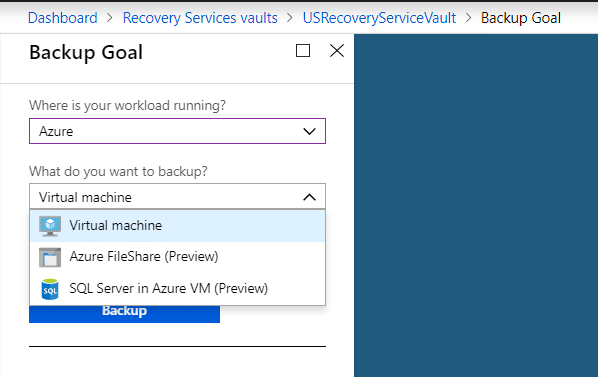
- There are 3 options (Virtual Machine, Azure File Share, SQL Server in Azure VM).Select Virtual Machine and click Backup
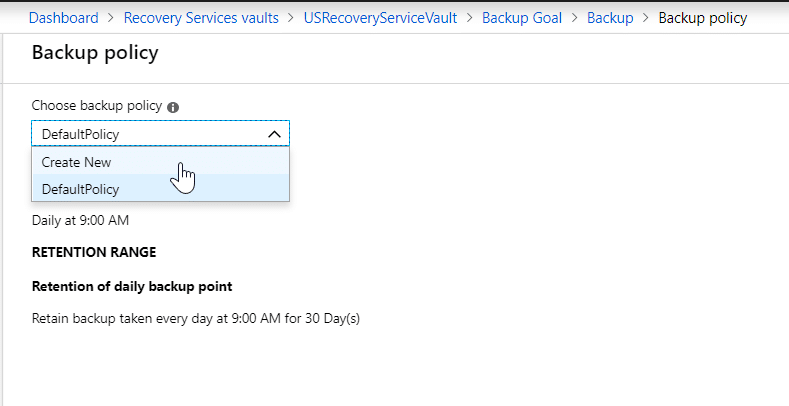
- You will get the backup policy page and select Create New as we want to see what options do we have to define the policy.
Option2: Backup For On Premise Machine
- Click on the backup button in the Recovery Service Vaults that you created
- If you select On-Premises, you will be presented with items that you want to backup
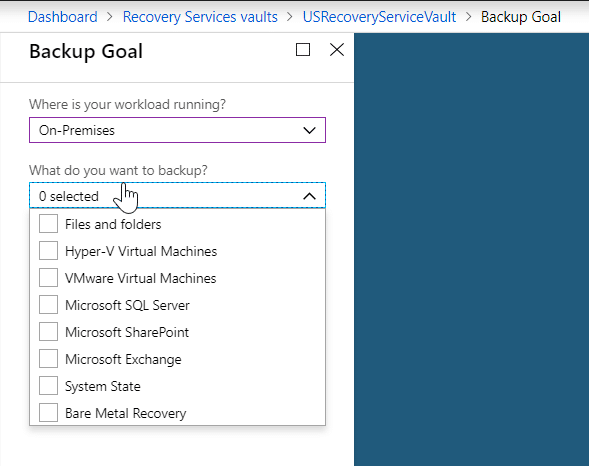
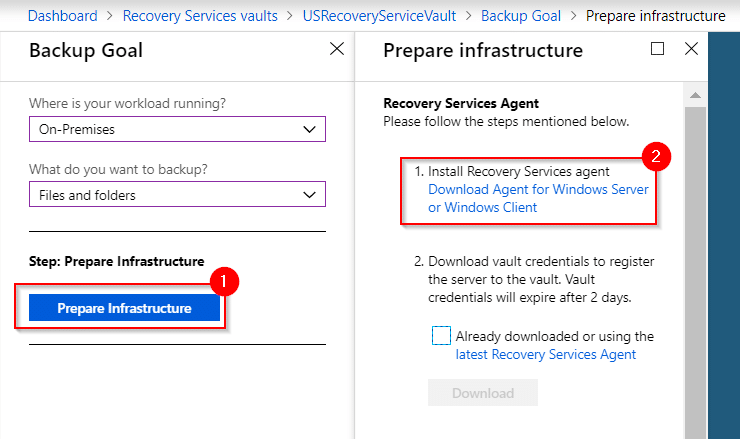
- Download and install the agent.
After you selected what items need to be backed up, you will need to click at the Prepare Infrastructure and from there, you can download the Recovery Services Agent.
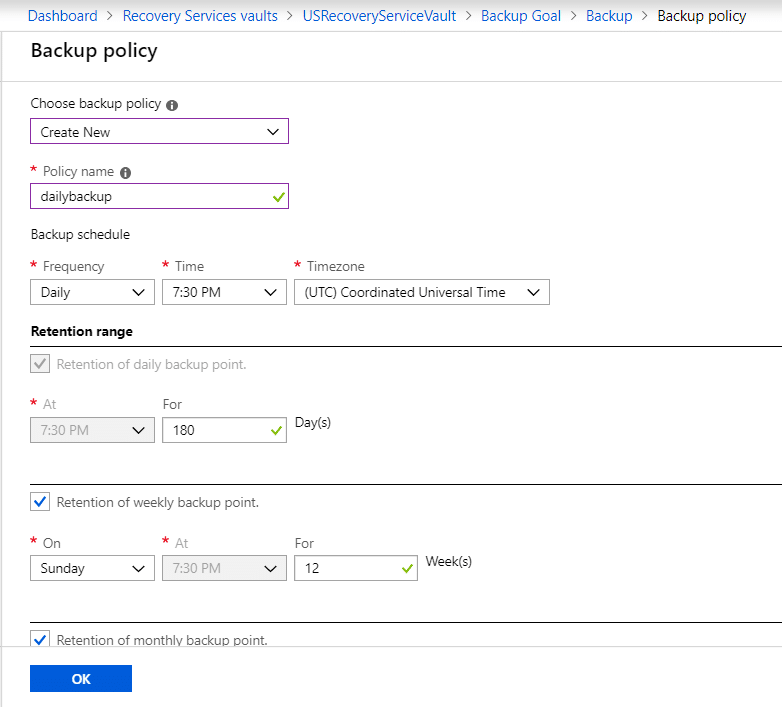
Set Backup Policy To Protect VMs
These are the options that you can specify in the backup policy
Select Items to backup
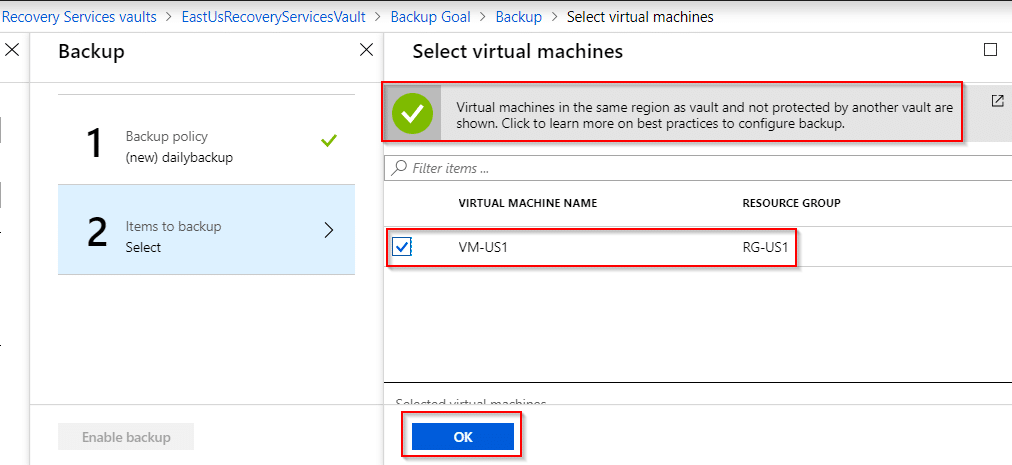
Note: Only virtual machines in the same region as vault will be displayed
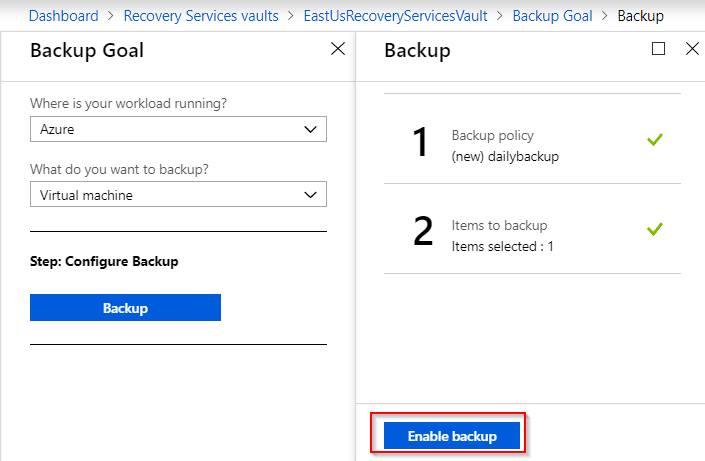
Enable Backup
Once you select OK, it’s time to enable backup
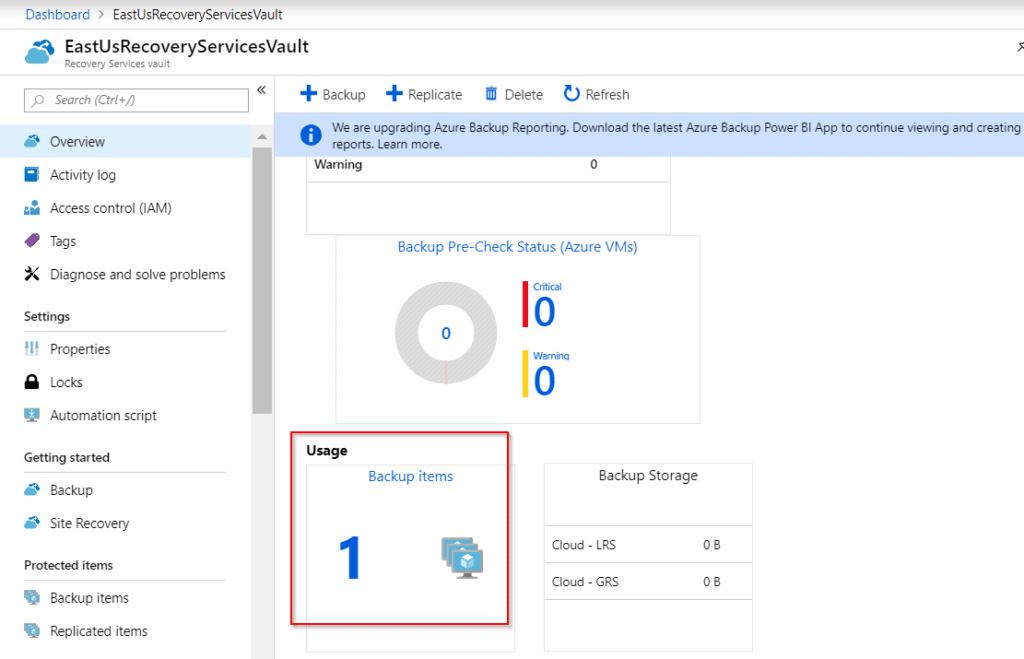
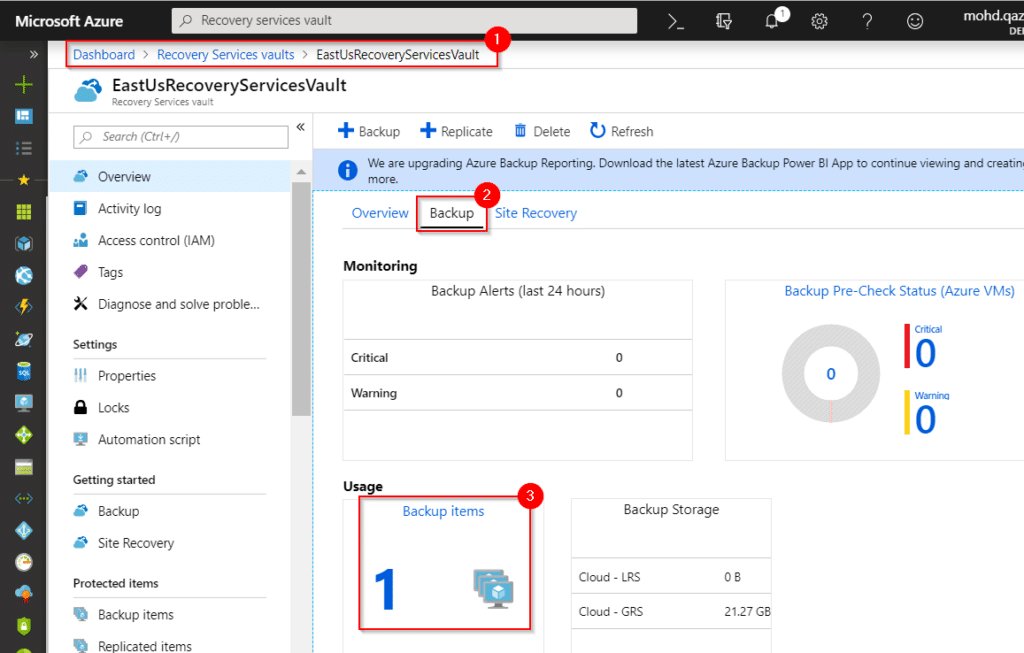
Go back to the recovery Services Vault dashboard and you can see we have 1 backup item created
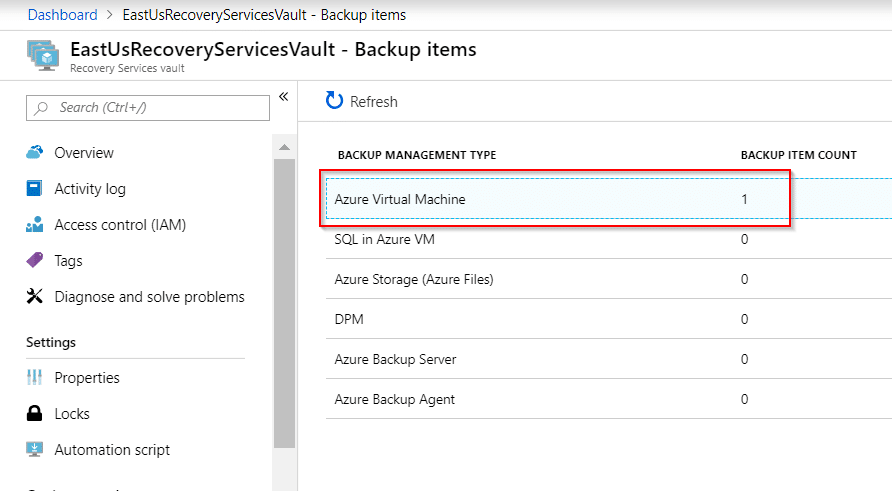
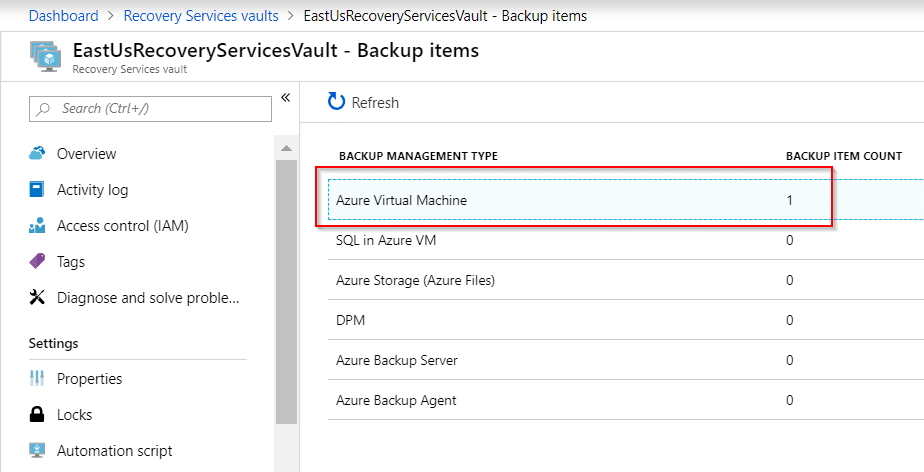
And when we click at that Backup items, we can see the details on backup item count
Deeper on the details when we click at the Azure Virtual Machine
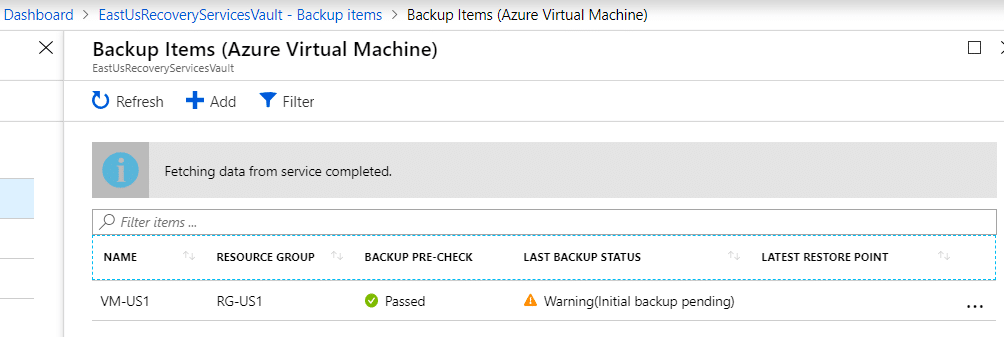
As we haven’t
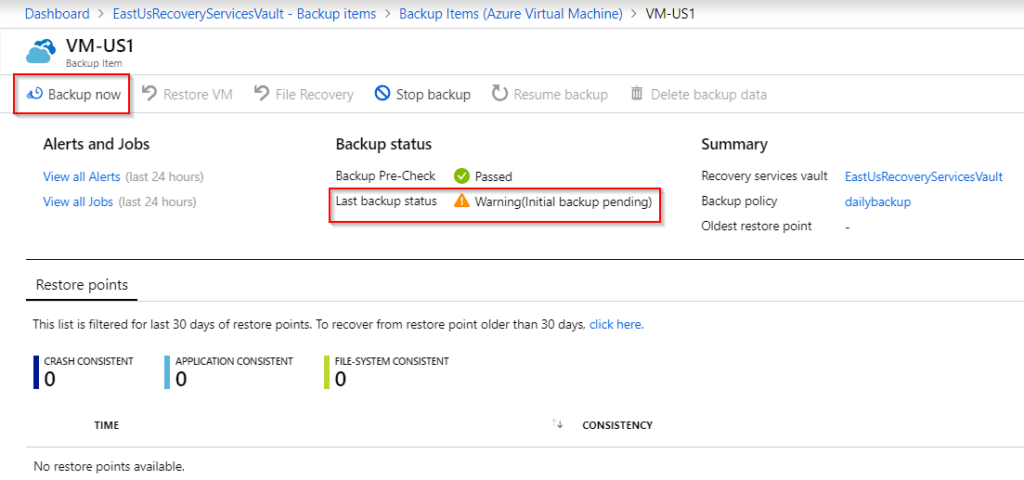
There is also an alert that reminds us to do initial backup
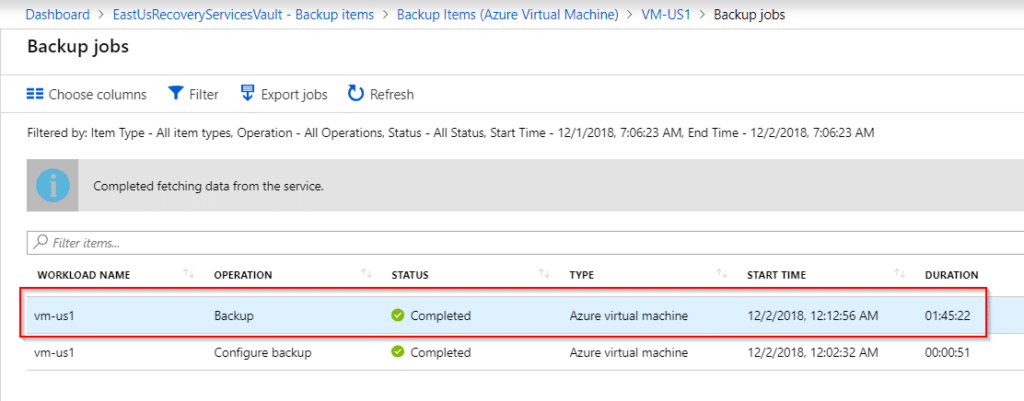
And once you trigger the backup, you can take a look at the progress by going to the Backup Jobs
The status will be in progress at first and turning into Completed once the backup is complete.
Restoring Backup
The purpose for backup is obviously to restore the data if you are having a data loss or Virtual machine corrupted.
To restore the backup, you will need to go back to Recovery Services Vault and find the Recovery Services Vault that you have created.
Or you if you remember the Recovery Services Vault name, just search it at the search function.
1. Go to Recovery Services Vaults that you’ve created
2. Click at the backup tab
3. Click at the backup items to select your backup
4. Select Backup Item that you want to restore

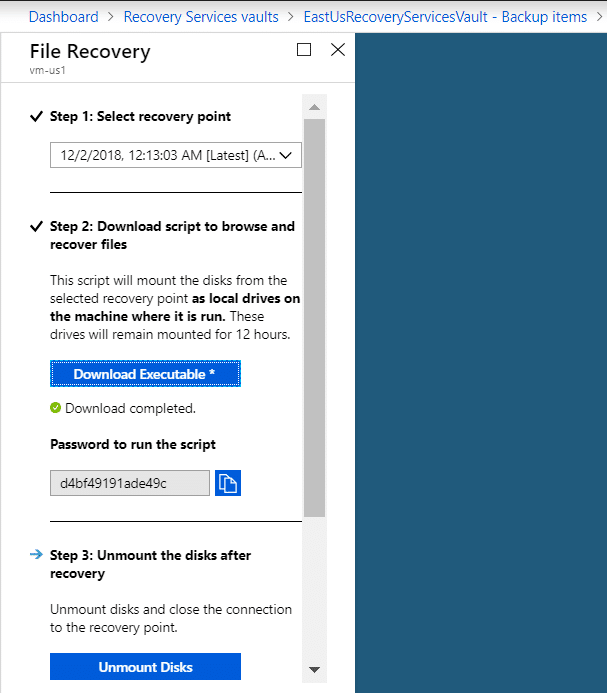
5. When you click at the specific backup item, you have 2 options to restore the backup:
- Restore VM (Restore the whole VM)
- File Recovery (Only restore specific files that you selected)
6. If you select File Recovery, you will need to download a script which will be run on the machine that initiates the restore.
The script will mount a new temporary disk to your machine and you can browse files that you want to restore from there.